When the lights go out, your generator stands ready. But between your generator and your home or business lies a critical, often-overlooked component: the automatic transfer switch (ATS). This unsung hero is what makes the switch from utility power to backup generator power seamless and, well, automatic. However, like any sophisticated piece of equipment, your transfer switch requires diligent Generator Transfer Switch Troubleshooting & Maintenance to ensure it’s always ready to perform its vital role.
Neglecting your ATS is like having a fire extinguisher without checking its pressure – it might look fine, but when you need it most, it could fail, leaving you in the dark. This comprehensive guide will equip you with the knowledge to maintain, troubleshoot, and even repair common issues, ensuring your power readiness is never in doubt.
At a Glance: Key Takeaways for Power Readiness
- Your ATS is Crucial: It’s the brain behind your backup power, enabling automatic, safe power transfers.
- Proactive is Power: Regular maintenance and testing are far better than emergency repairs.
- Common Culprits: Mechanical wear, electrical faults, and control panel issues are frequent problems.
- Know Your Steps: Visual inspections and multimeter tests are your first line of defense.
- Don't Overlook the Basics: Battery health, environmental factors, and proper sizing matter.
- When in Doubt, Call a Pro: Some issues require specialized expertise for safety and effectiveness.
Why Your ATS Needs TLC: The Heartbeat of Backup Power
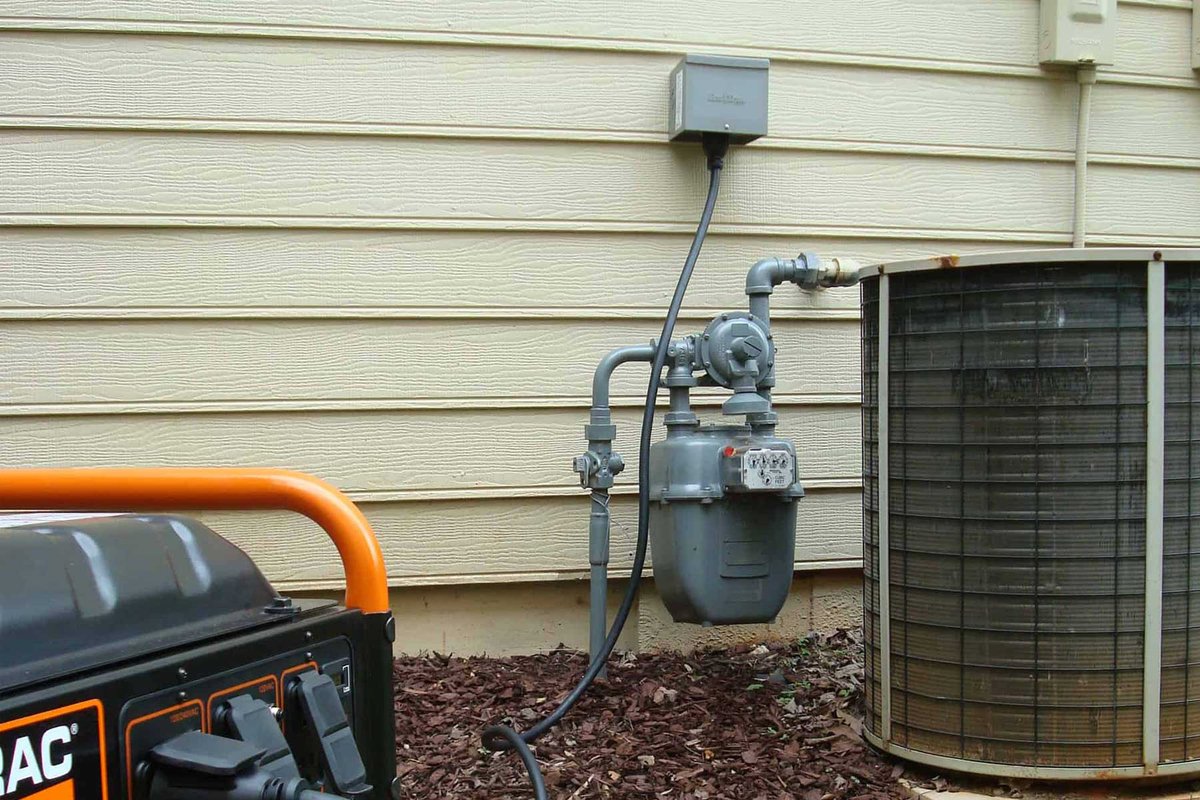
Imagine a sudden blackout. You hear your generator hum to life, but your lights stay off. Frustrating, right? That’s where the Automatic Transfer Switch (ATS) comes in. It's the intelligent intermediary that senses a utility outage, signals your generator to start, and then safely switches your electrical load from the utility grid to your generator. Once utility power is restored, it seamlessly reverses the process. Without a well-maintained ATS, your generator is just an expensive paperweight during an outage.
Understanding generator transfer switches, their types, and how they operate is the first step toward proactive maintenance. For a deeper dive into the fundamentals, you might find our article on understanding generator transfer switches incredibly helpful. But for now, let's focus on keeping the one you have in peak condition.
Proactive Power: Essential Maintenance Practices for Your Transfer Switch
Think of maintenance as preventative medicine for your transfer switch. Regular checks extend its life, prevent costly breakdowns, and most importantly, guarantee it works when you need it most. This isn’t just about fixing things when they break; it's about making sure they never break when the stakes are high.
The Non-Negotiable Exercise: Regular Testing
Your ATS isn't meant to sit idle. It's a dynamic system that benefits from regular use. Establishing a consistent exercise schedule is paramount.
- Monthly Drills: At least once a month, you should simulate a power outage. This typically involves using the test function on your ATS control panel or manually disconnecting utility power (if safe and advised by manufacturer guidelines). Watch the transfer switch closely to ensure it transitions smoothly from utility to generator power, and then back again when utility power is "restored."
- Monitor the Performance: During these tests, pay attention to the timing. Does the generator start promptly? Does the switch make a clean, confident transfer? Are there any unusual noises or delays? Document everything, especially any irregularities. This log becomes a valuable diagnostic tool over time.
- Full Load Tests (Periodically): While monthly tests are great for functionality, a full load test—where your generator actually powers your facility's entire demand—is crucial every six months to a year. This confirms not only that the ATS can transfer power, but also that both the generator and ATS can handle the actual electrical load under real-world conditions. This might require professional assistance to safely conduct.
A Deep Dive into Your System's Health: Scheduled Maintenance Checks
Beyond simple testing, a more thorough inspection is needed every six months. This is where you get granular, looking for signs of wear and tear that could lead to future problems.
- Wiring and Connections: The integrity of your electrical connections is vital. Visually inspect all wiring for signs of fraying, cracking, or discoloration—indicators of overheating or damage. Gently tug on connections to ensure they are tight. Loose connections can lead to resistance, heat buildup, and eventually, failure. If you find any, tighten them securely using the appropriate tools.
- Cleanliness is Key: Dust, debris, and even insect nests can accumulate within the transfer switch enclosure. These can impede moving parts, cause overheating, or even lead to short circuits. Use a soft brush, a vacuum cleaner, or compressed air (with caution to avoid pushing debris further into components) to remove any contaminants.
- Component Inspection: Check for obvious signs of wear or damage on relays, contactors, and other mechanical parts. Look for scorch marks, melted plastic, or unusual odors. For units with fuses, inspect them for signs of blowing. If you have circuit breakers within the ATS, ensure they are in the "on" position unless a fault has tripped them.
- Lubrication (Where Applicable): Some mechanical components may require lubrication. Refer to your manufacturer's manual for specific instructions on what type of lubricant to use and where to apply it. Proper lubrication reduces friction and wear, extending component life.
- Documentation: Keep a detailed log of every maintenance session. Note the date, what was inspected, any issues found, actions taken, and the results of any tests. This record helps you track performance trends, predict potential problems, and provides a clear history for technicians if professional help is ever needed.
Spotting the Red Flags: Common Transfer Switch Problems
Even with the best maintenance, issues can arise. Knowing the most common problems and their root causes empowers you to identify and address them quickly, often before they escalate into complete system failure.
Wear and Tear: Addressing Mechanical Failures
Components like relays, switches, and motors within your ATS are constantly at work, and over time, they simply wear out. This natural degradation is accelerated by factors like dust, moisture, and lack of proper lubrication.
- The Problem: Worn contacts, sticky relays, or failing motors prevent the switch from making a clean transfer. You might hear clunking noises, notice slow transfers, or a complete failure to switch.
- Prevention/Resolution: During your scheduled maintenance, meticulously inspect these moving parts. Look for physical signs of wear—pitting on contacts, stiffness in moving arms, or excessive dust accumulation. Clean and lubricate as per manufacturer instructions. If components show significant wear, replace them promptly before they cause a critical failure during an actual outage.
The Silent Saboteurs: Electrical Connection Issues & Faulty Wiring
Loose, damaged, or corroded electrical connections are insidious problems. They don’t always announce their presence with a bang but can cause erratic behavior, overheating, and eventual system failure.
- The Problem: Poor connections increase resistance, leading to heat buildup, arcing, sparking, and ultimately, a breakdown in electrical flow. This can manifest as intermittent power, failed transfers, or even fire hazards.
- Prevention/Resolution: This is where your semi-annual inspection pays dividends. Systematically check and tighten all electrical connections. Look for discolored wiring (a sign of overheating) or corrosion, which often appears as a greenish or whitish crust. Clean corroded terminals with a specialized electrical contact cleaner and a wire brush. For exposed connections in damp environments, consider applying an anti-corrosion sealant. Any damaged wires should be repaired by a qualified electrician or replaced immediately.
Brain Drain: When Control Panels Fail
The control panel is the "brain" of your ATS, housing the circuitry and electronics that sense power outages and command the transfer. A failure here renders the entire system unresponsive.
- The Problem: Electronic components can degrade, leading to incorrect signals, error codes, or a complete inability for the ATS to detect power loss or command the generator. Modern units might also suffer from outdated firmware.
- Prevention/Resolution: Regularly test your control panel's functionality. This means observing its behavior during your monthly exercise tests, ensuring it sends and receives signals correctly, and that all indicator lights function as expected. For units with software, keep an eye out for manufacturer firmware updates and install them as recommended to improve reliability and address potential bugs.
Fit Matters: Improper Sizing or Installation Pitfalls
An ATS that's too small for its intended load is a recipe for disaster. Similarly, a botched installation can doom even the best equipment.
- The Problem: An undersized ATS will be overloaded, leading to constant tripping, reduced efficiency, excessive heat, and premature component failure. Incorrect installation, on the other hand, can result in misalignment, poor connections, or incorrect programming, preventing proper operation.
- Prevention/Resolution: The critical step here is before installation. Always consult with a qualified electrician or power systems expert to ensure your ATS is correctly sized for your current and anticipated future electrical load. For installation, always use certified technicians. If you suspect an existing ATS is improperly sized or installed, have it evaluated by a professional immediately. They can assess the load, check installation standards, and recommend necessary upgrades or corrections.
The Power-Quality Paradox: Guarding Against Fluctuations
The electrical grid isn't always perfectly stable. Fluctuations like voltage surges, spikes, or drops can be detrimental to sensitive electronics within your ATS.
- The Problem: Unstable power can damage control circuitry, cause relays to malfunction erratically, and reduce the overall lifespan of the unit. These issues might not be immediately obvious but can lead to long-term reliability problems.
- Prevention/Resolution: Install robust surge protection devices (SPDs) on both the utility side and the generator side of your electrical system. These devices absorb excess voltage, protecting your ATS and other sensitive equipment. If you experience frequent power quality issues, consider a professional power quality analysis to identify anomalies and address underlying causes, such as improper grounding.
Lifeline Lost: Battery Failure (for units with battery backup)
Some ATS units, particularly those with sophisticated control panels or for specific applications, rely on an internal battery to power their controls, especially during the initial stages of a power outage before generator power is stable.
- The Problem: A dead or weak battery means the control panel might not have enough power to initiate the transfer sequence or communicate effectively. The ATS might simply fail to respond.
- Prevention/Resolution: Treat your ATS battery like any other critical backup battery: include it in your regular maintenance schedule. Test its charge and condition. Clean any corrosion from its terminals. Replace batteries according to manufacturer recommendations, typically every 3-5 years, even if they seem to be working. Ensure connections are tight and free of corrosion.
Environment's Impact: Shielding Your Switch
The operating environment plays a significant role in the longevity and reliability of your transfer switch. Extreme temperatures, high humidity, or excessive dust can all degrade performance.
- The Problem: High temperatures accelerate component wear. Moisture can lead to corrosion and short circuits. Dust acts as an insulator, causing overheating, and can impede mechanical movement.
- Prevention/Resolution: If your ATS is in a harsh environment, consider additional protective measures. This might include installing it within a weather-resistant enclosure, adding climate control systems (like heaters or air conditioners) to maintain optimal temperature and humidity, or using specialized filters and dust covers to protect internal components. Proper ventilation is also crucial to dissipate heat.
The Weakest Link: Fuses and Circuit Breakers
Sometimes, the problem is as simple as a protective device doing its job – but it still requires attention.
- The Problem: Blown fuses or tripped circuit breakers within the transfer switch circuitry indicate an overload or a short circuit. While they protect the system, they also stop its operation until addressed.
- Prevention/Resolution: During troubleshooting, check fuses for a broken filament and circuit breakers for a tripped position. Replace blown fuses only with ones matching the exact voltage and amperage ratings specified by the manufacturer. If a circuit breaker trips, reset it. However, if fuses blow or breakers trip repeatedly, it's a clear sign of an underlying issue like an overload, a ground fault, or a short circuit that needs immediate investigation by a qualified professional. Replacing fuses without addressing the root cause is a temporary fix at best.
When Things Go Sideways: Step-by-Step Troubleshooting Your ATS
When your ATS isn't performing as expected, a systematic troubleshooting approach can help pinpoint the problem. Always prioritize safety: ensure power is off to the transfer switch before beginning any internal inspection or work.
First Look: The Power of Visual Inspection
Before grabbing any tools, a thorough visual inspection can reveal many common issues.
- Safety First: Ensure the generator is off, and if possible, disconnect utility power to the transfer switch for maximum safety before opening any covers.
- Exterior Scan: Look for any obvious physical damage on the switch's exterior – cracks, burn marks, or signs of overheating (discolored panels).
- Interior Check: Carefully open the ATS enclosure. Look for:
- Loose Connections: Gently tug on all accessible wires and terminals. Tighten any that feel loose.
- Corrosion: Inspect terminals and contacts for rust, verdigris (greenish corrosion), or white powdery buildup.
- Burnt Wires/Components: Look for black, charred, or melted insulation on wires or components. This is a clear sign of overheating.
- Debris: Dust, dirt, insects, or rodent nests can impede operation.
- Fuses/Breakers: Check if any fuses are blown (a broken wire inside the glass tube) or if circuit breakers are in the tripped position (often halfway between ON and OFF, or a distinct "TRIP" indicator).
- Control Panel Errors: Look for any warning lights, error codes, or unusual displays on the control panel. Consult your manual to interpret these.
Beyond the Surface: Testing with a Multimeter
When a visual inspection doesn't reveal the culprit, a multimeter becomes your most valuable diagnostic tool. Only proceed with multimeter testing if you are comfortable and trained in working with live electrical circuits. If not, call a professional.
- Voltage Checks (AC Voltage Setting):
- Input Terminals (Utility Side): With utility power on, measure the voltage at the incoming utility terminals. This confirms the ATS is receiving power from the grid.
- Input Terminals (Generator Side): With the generator running and producing power, measure the voltage at the incoming generator terminals. This confirms the generator is supplying power to the ATS.
- Output Terminals: During a simulated transfer, measure the voltage at the output terminals of the ATS. This confirms that power is being successfully transferred from the selected source (utility or generator) to your load. If you have voltage at the input but not the output, the transfer mechanism itself might be faulty.
- Continuity Checks (Continuity Setting):
- (Power MUST be off for continuity testing!)
- Relays/Contacts: With all power off, test the continuity across the contacts of internal relays or switches when they are in their "closed" position (as if power should be flowing). A lack of continuity indicates a faulty relay or contact that needs repair or replacement.
- Wiring: Test segments of wiring for continuity to ensure there are no breaks in the circuit.
Getting Your Hands Dirty (or Calling a Pro): Repairing and Replacing Components
Once you've identified the issue, the next step is to rectify it. Some repairs are straightforward, while others demand expert hands.
Fixing the Faults: Common Component Repairs
- Loose/Damaged Wiring: Tighten any loose connections. If a wire is visibly damaged (frayed, burnt insulation), it must be replaced. Ensure the new wire is of the correct gauge and insulation rating.
- Blown Fuses: Always replace a blown fuse with an exact match in terms of voltage and amperage. Never use a higher-rated fuse, as this removes a critical safety measure and could lead to severe damage or fire. If fuses repeatedly blow, you have an underlying short circuit or overload issue that must be investigated.
- Tripped Circuit Breakers: Simply reset the breaker. If it immediately trips again, do not continue resetting it. There's a fault in the circuit that needs professional diagnosis.
- Corrosion: Clean corroded terminals and components thoroughly using an approved electrical contact cleaner and a non-abrasive brush. Apply a dielectric grease or anti-corrosion sealant to prevent future buildup, especially in humid environments.
- Dust and Debris: Thoroughly clean the interior of the ATS using a vacuum and soft brushes. Compressed air can be used carefully, ensuring debris isn't simply pushed into more sensitive areas.
- Sticky/Worn Mechanical Parts: For parts that are stiff or showing minor wear, cleaning and lubrication (following manufacturer guidelines) might restore function. However, if contacts are severely pitted or mechanical parts are broken, replacement is often the only reliable solution.
Calling It Quits: When to Replace the Transfer Switch
Sometimes, repair isn't feasible or cost-effective. A complete transfer switch replacement becomes necessary when:
- Extensive Damage: The unit has suffered severe water damage, fire damage, or extensive physical damage that compromises its structural integrity or electrical safety.
- Obsolete Parts: Critical components are no longer available for repair, making the unit impossible to fix.
- Repeated Failures: Despite repairs, the ATS continues to fail, indicating a systemic issue or the end of its useful life.
- Technological Advancement: You're upgrading your generator or electrical system, and the old ATS isn't compatible or lacks necessary features.
- Safety Concerns: A qualified electrician deems the unit unsafe to operate even after repairs.
If replacement is necessary:
- Selection: Identify a new transfer switch that is compatible with your generator's output and your facility's electrical load requirements. Matching voltage, amperage, and phase (single or three-phase) is crucial.
- De-energize: Turn off ALL power to the existing transfer switch and the generator. This means disconnecting utility power at the main breaker and ensuring the generator cannot start.
- Disconnect: Carefully disconnect the old switch, labeling each wire meticulously as you remove it. Taking photos can also be invaluable for reference.
- Install: Mount the new switch securely and meticulously reconnect the wiring according to the manufacturer's instructions and your labels.
- Test: After installation, carefully re-energize the system (utility first, then generator) and perform thorough functional tests to confirm correct operation and safe transfers. This step is best done by a qualified professional.
Ensuring Seamless Transitions: Your Path to Uninterrupted Power
Maintaining your generator transfer switch isn't a chore; it's an investment in peace of mind. Regular maintenance, timely inspections, and understanding basic troubleshooting steps are critical for extending equipment lifespan, reducing downtime, and safeguarding the resilience of your backup power system. Your ultimate goal is seamless power transitions, every single time.
The Professional Edge: Why Consider Expert Assistance
While DIY troubleshooting and maintenance can address many common issues, there's a point where professional expertise becomes invaluable, if not essential.
- Complexity: Modern ATS units can be complex, involving intricate electronics and programming that require specialized diagnostic tools and knowledge.
- Safety: Working with high voltage is inherently dangerous. Professionals are trained in safety protocols and have the necessary personal protective equipment (PPE).
- Warranty: Many manufacturers require professional installation and periodic maintenance to keep warranties valid.
- Advanced Diagnostics: Service providers have sophisticated equipment to perform power quality analyses, thermal imaging (to detect hot spots), and in-depth component testing that goes beyond a standard multimeter.
Consider partnering with a reliable service provider for annual or semi-annual professional maintenance. Their expertise can catch subtle issues before they become major failures, ensuring your system remains in top condition and you adhere to best practices.
Your Maintenance Log: Tracking for Success
Remember the power of documentation. A well-kept maintenance log is your system's health record. It allows you to:
- Track Performance: Notice trends in how your ATS operates over time.
- Predict Issues: Identify recurring problems or components nearing the end of their life.
- Inform Technicians: Provide a clear history of maintenance and issues, saving diagnostic time during service calls.
- Prove Diligence: Valuable for warranty claims or insurance purposes.
By integrating regular checks, informed troubleshooting, and professional support into your routine, you transform your generator transfer switch from a potential weak link into a reliable cornerstone of your power independence. Don't wait for the next outage to discover a problem; ensure your power readiness today.